
In this project, our group built a haunted house experience in VR. Following the design procedures that we learned over the semester and from our previous projects, we took different components in VR, such as camera, lighting, audio, and animation, into consideration, and created an interactive, intriguing VR experience.
Introduction
Virtual reality, or VR, refers to the use of computer modeling and simulation that enables a person to interact with an artificial environment. The immersive experience that VR brings has led to its wide use in industry and research.
In this project, we explored ways to craft a haunted house experience using VR, as well as multiple approaches to enhance interactivity and immersiveness. We used A-Frame to build our environment, hosted it on Github, and introduced different 3D models to our set. We incorporated audio, camera movements, and jumpscares in our design, which made the VR experience scary without overwhelming our users.
In this project, we explored ways to craft a haunted house experience using VR, as well as multiple approaches to enhance interactivity and immersiveness. We used A-Frame to build our environment, hosted it on Github, and introduced different 3D models to our set. We incorporated audio, camera movements, and jumpscares in our design, which made the VR experience scary without overwhelming our users.
A-Frame
A-Frame is a web framework for building VR experiences. Based on HTML scripts, A-Frame provides a wide scope of features to help users build impressive VR environments. During initial development, we used A-Frame to help us build an environment fast.
A-Frame is a web framework for building VR experiences. Based on HTML scripts, A-Frame provides a wide scope of features to help users build impressive VR environments. During initial development, we used A-Frame to help us build an environment fast.
Design Process
Our group brainstormed about different themes that we could build upon for this project. Considering the timeframe of this project and user interactivity, we settled on building a haunted house experience, which would also go with the Halloween season.
The group then met to discuss the platform and search for resources for tutorials and 3D models. We first tried to use Unity for its capacity to support complicated design, but later switched to A-Frame which allows us to build an environment faster and has the features we needed. Additionally, we discussed over building the experience compatible with multiple devices, including smartphones and desktops, as well as using Google Cardboard.
At this stage, the group members also split up work for this project based on each of our backgrounds. Lilian and Huy were in charge of implementing the VR experience, and Arvin and Fangyi created moodboards, sketches, and kept track of the design process.
Moodboards
** Content warning: the images below can be scary **
We began by brainstorming the type of horror we wanted to deliver to users, in theme with Halloween season. Arvin was in charge of creating a mood board to gather inspirations for later implementation. Like different subgenres of horror movies, spookiness can be delivered via many methods. I would divide spookiness mostly into unsettledness, gore, and jump scares. We decided to combine some elements of horror from all categories to create the best experience within our powers but eliminated gore since we wanted to elicit scariness without making people feel physically uncomfortable.
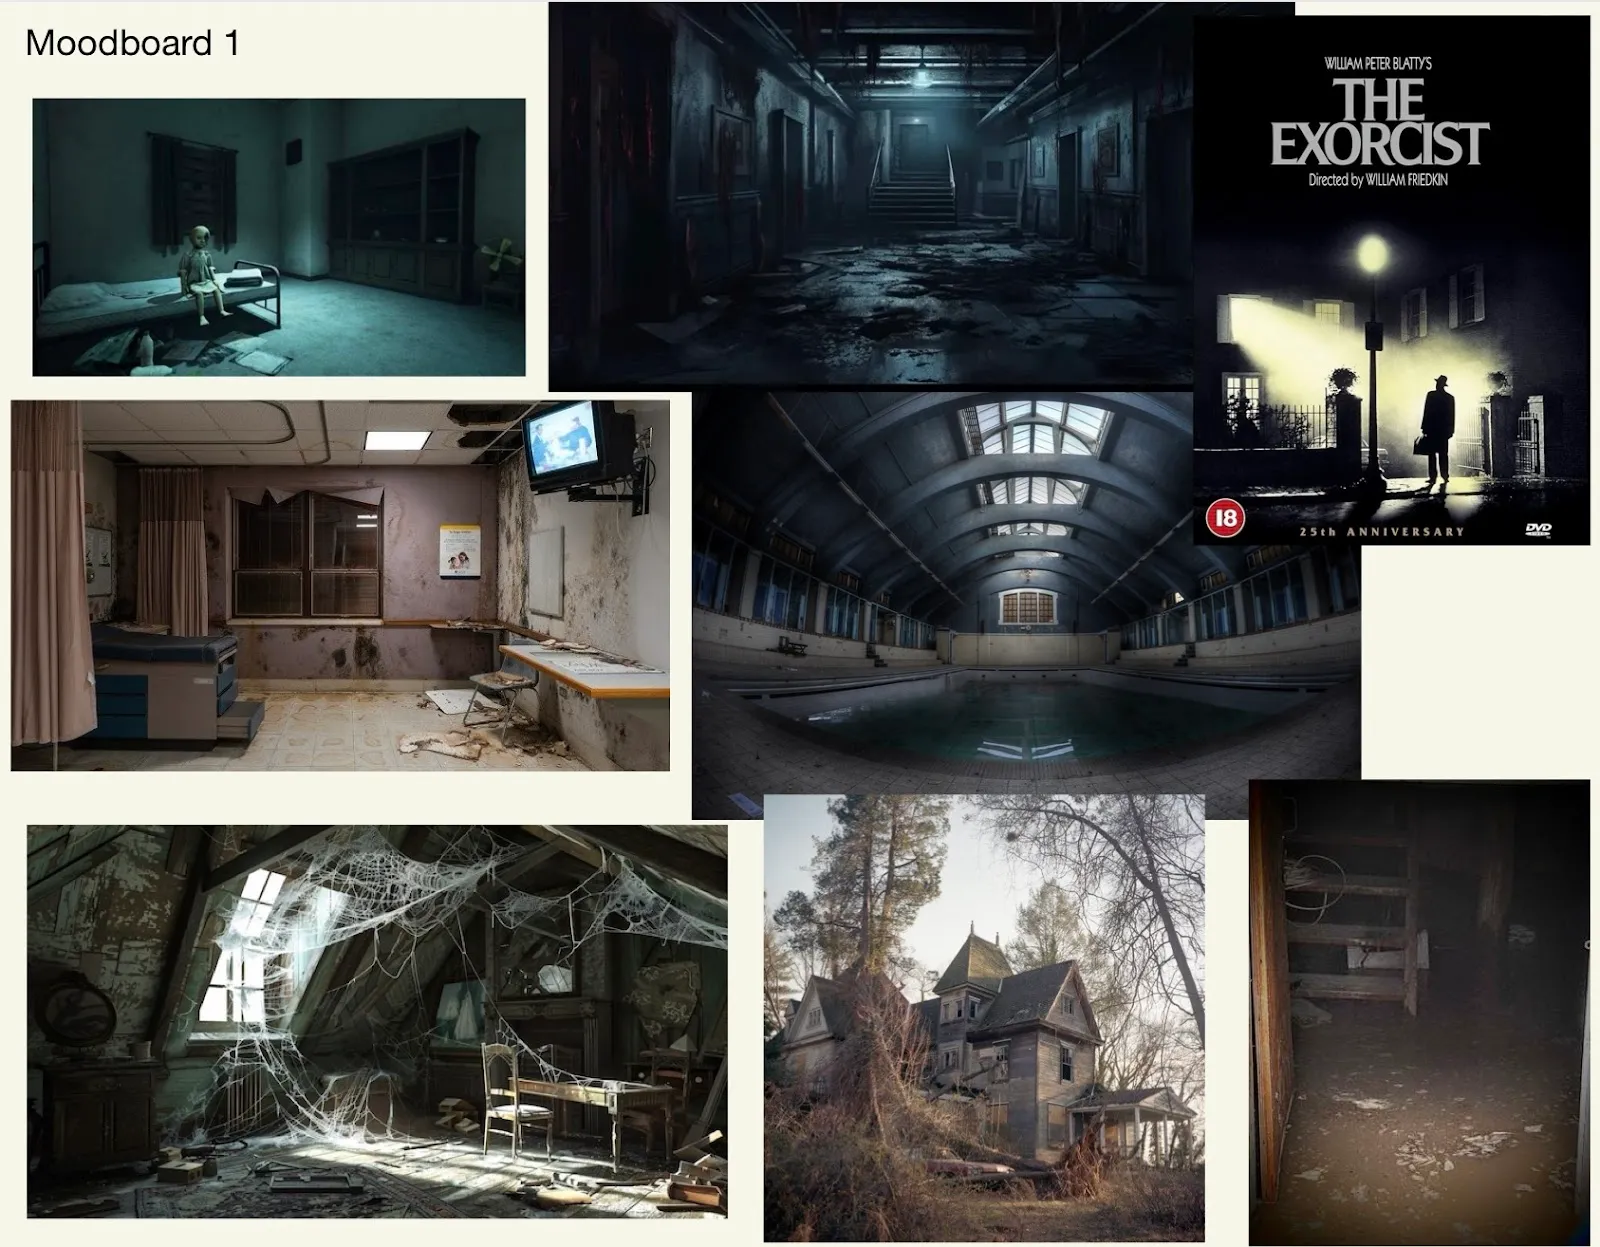
In Moodboard 1, I focused more on people’s unsettling feelings — heightened tension — when they are in the dark, exploring unknown areas, and trying to do something stealthy (like having to sneak past someone). These would be horror movie scenes with a jumpscare coming up. I tried to find pictures with lots of darkness, decrepit buildings, and familiar yet unfamiliar environments. Hopefully, they can tense users up and make them afraid of potential jumpscares. Combined with the use of spooky music, the user could be fully immersed in a scary virtual world.
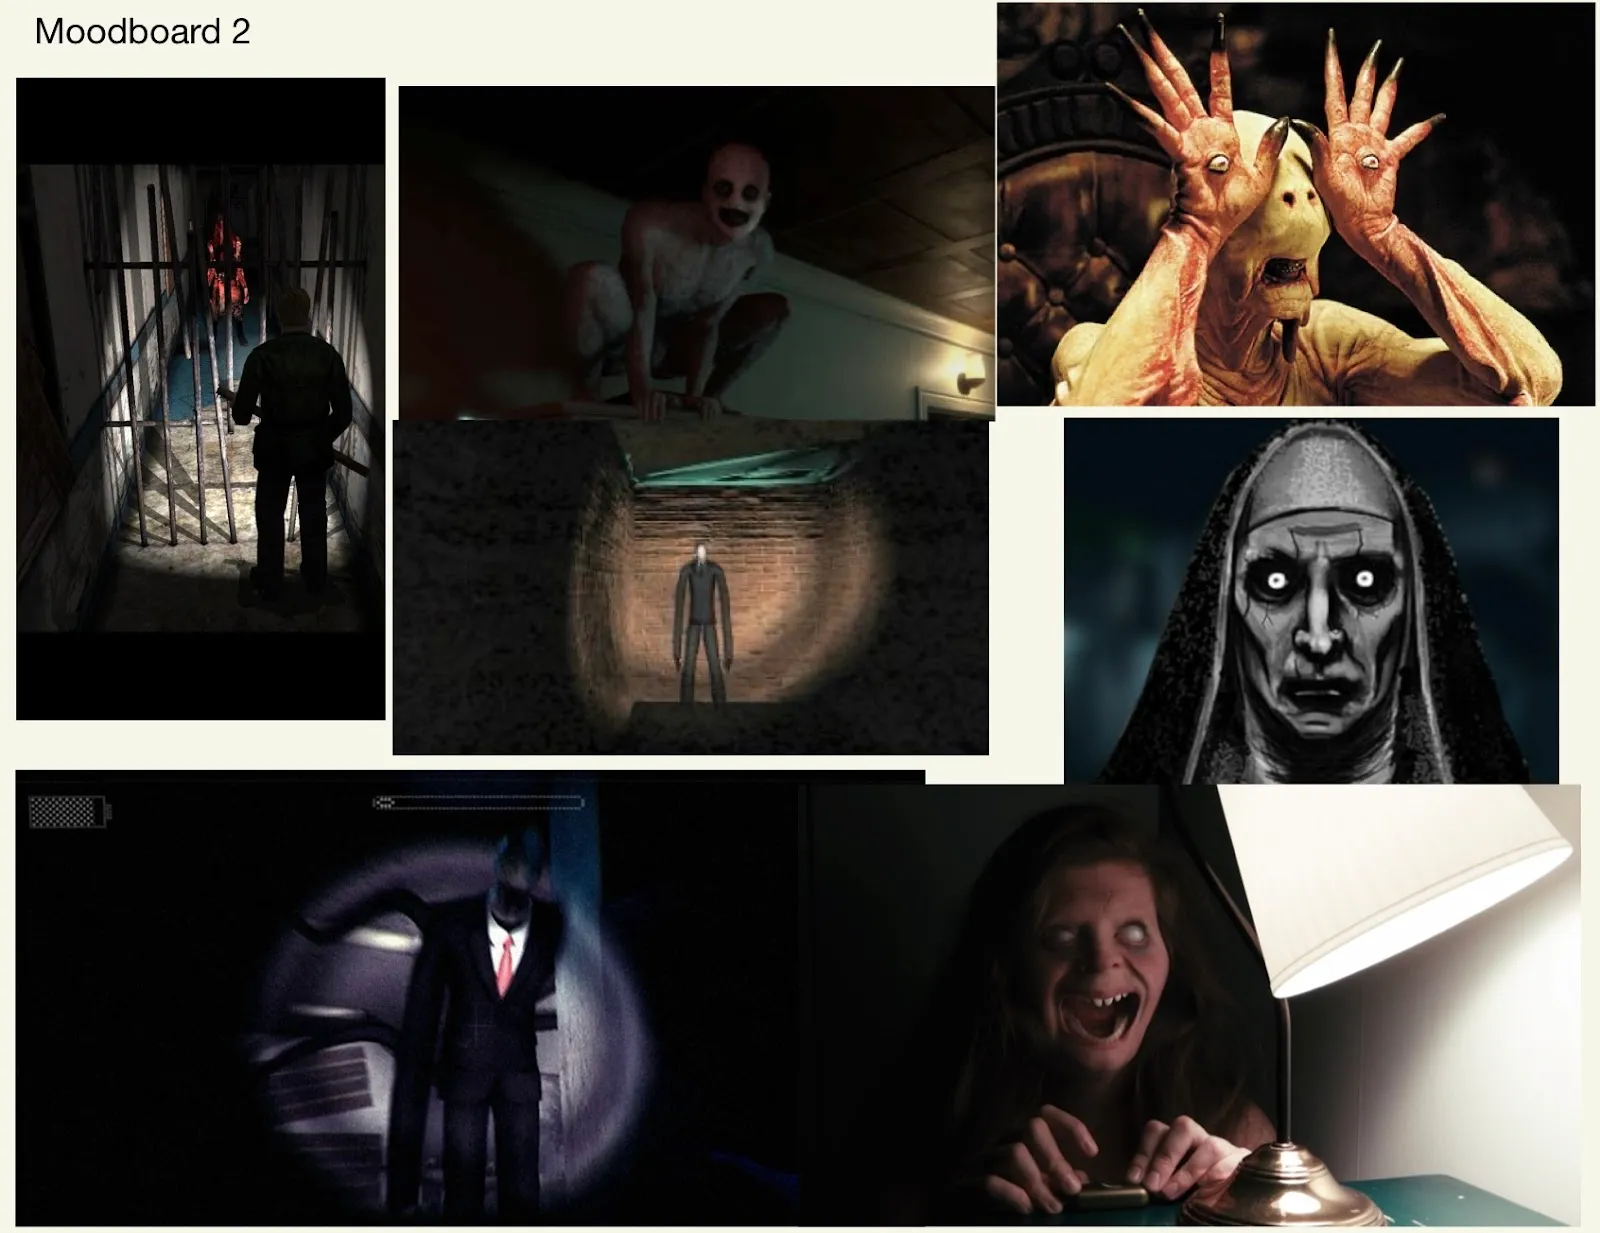
In Moodboard 2, I took a slightly different approach and focused more on scary creatures. The “Uncanny Valley Effect” theorizes that people find creatures that are about 80% human-like yet not completely human the scariest: the storyboard had plenty of creepy creatures that have certain human-resembling features that make them extra scary. By putting users into an immersive environment filled with creepy creatures, we are certain they can get an intense (yet enjoyable) spooky experience.
Sketches
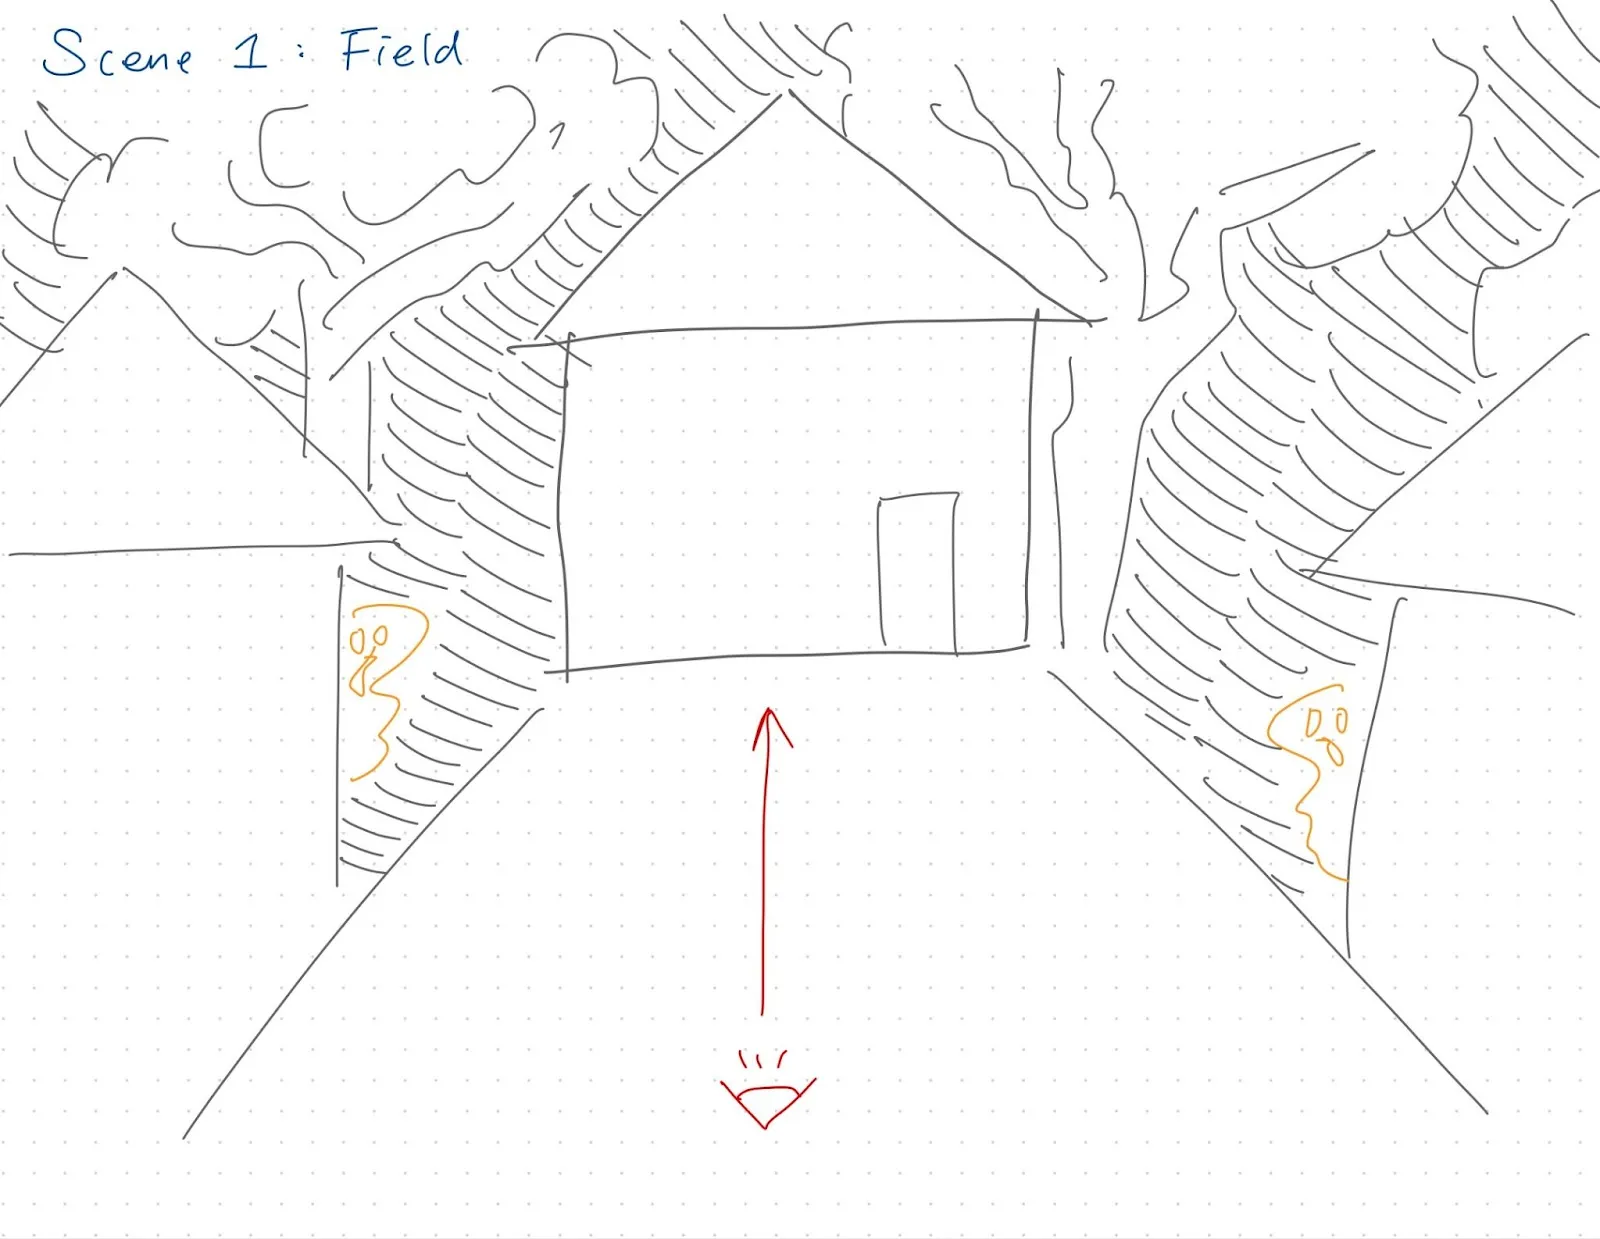
In our first sketch, we envisioned an environment where users see themselves on a street. They can see plenty of haunted houses, even with creepy creatures peeking from the walls, and actively move into the houses to see the haunted house interiors.
The goal here is to establish an environment that users find familiar, like their home neighborhood, but simultaneously strange and spooked by ghosts and unknown creatures. This idea utilizes interactivity through user-controlled movement, choosing where on the map to go and which house to visit. Combined with implementations of wind and music, along with interactivity, the user in this virtual reality fully experiences what it is like being in a haunted environment.
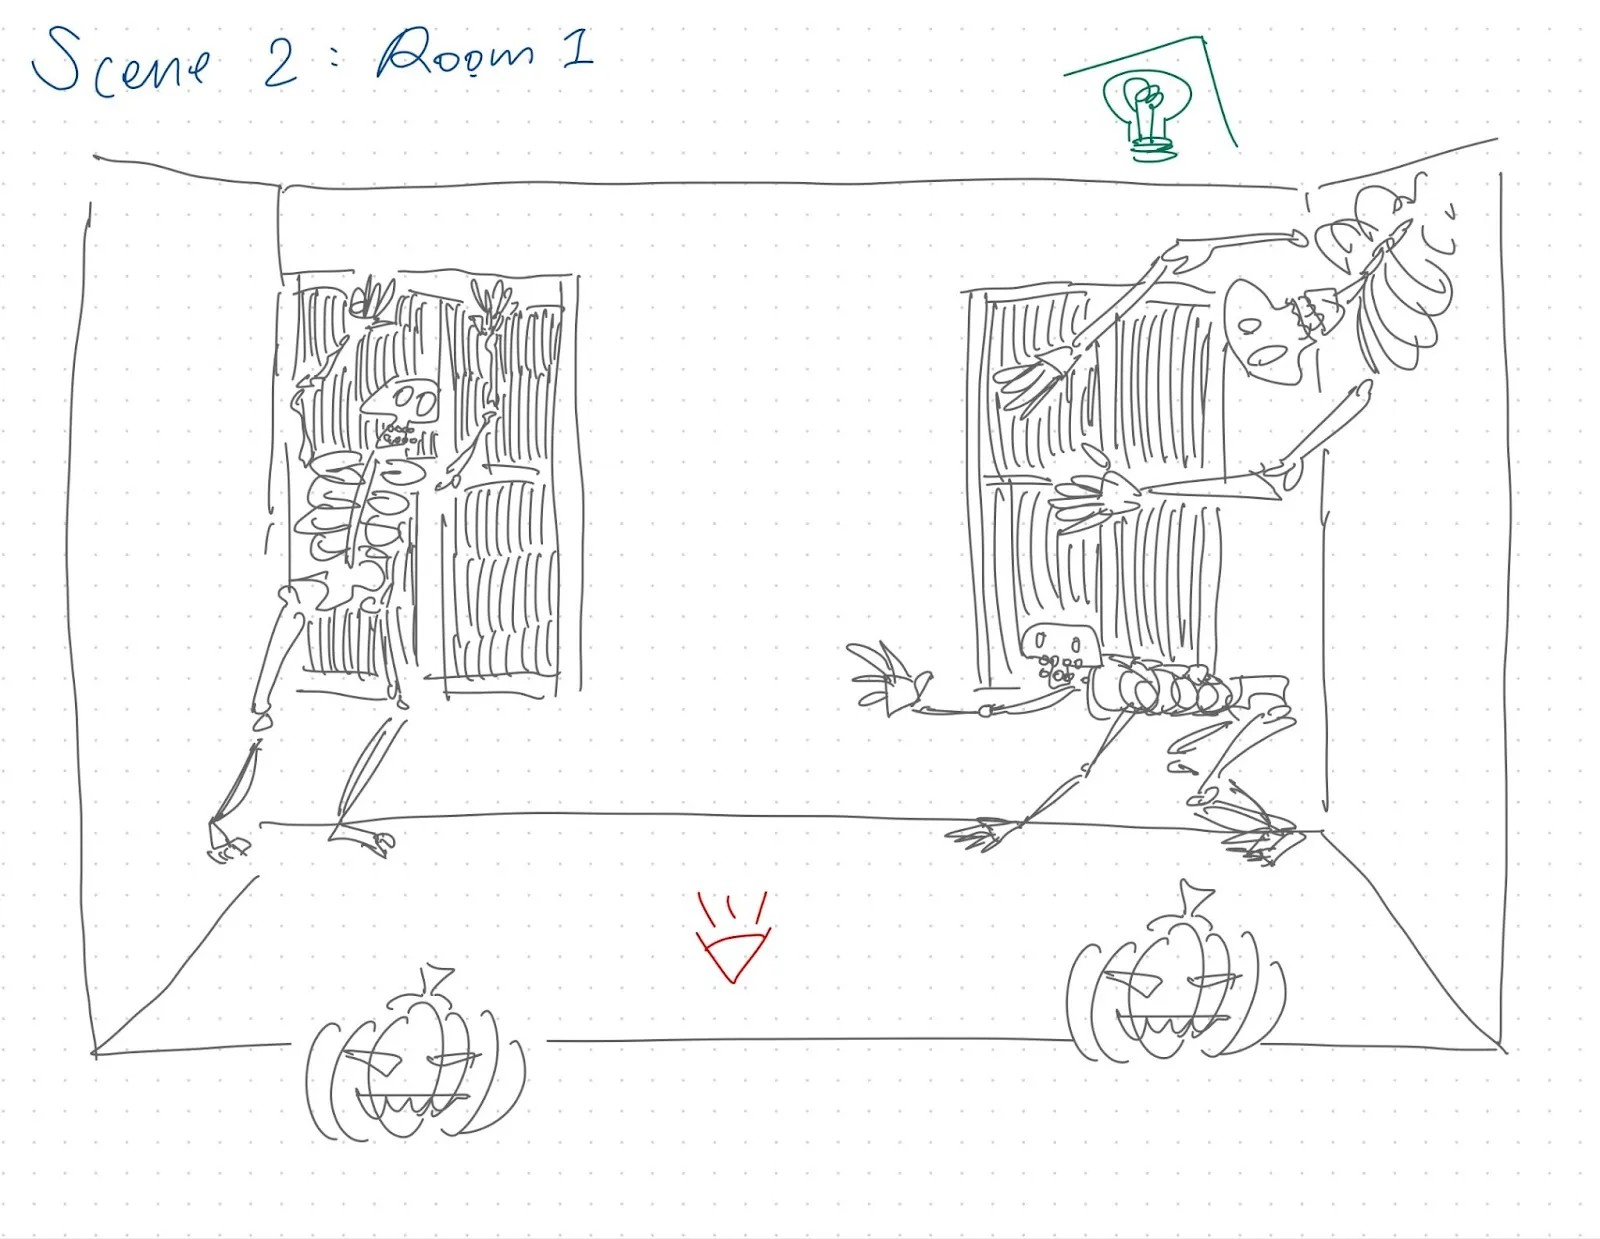
Scene 2 shows the user going into one of the rooms: static spooky skeletons and moving skeletons giving users jumpscares through the walls, sealed windows, and carved pumpkins to fully give users the Halloween experience. Combined with unsettling music and jumpscare screams along with the skeleton jump, this should create an immersive experience stimulating both senses of users.
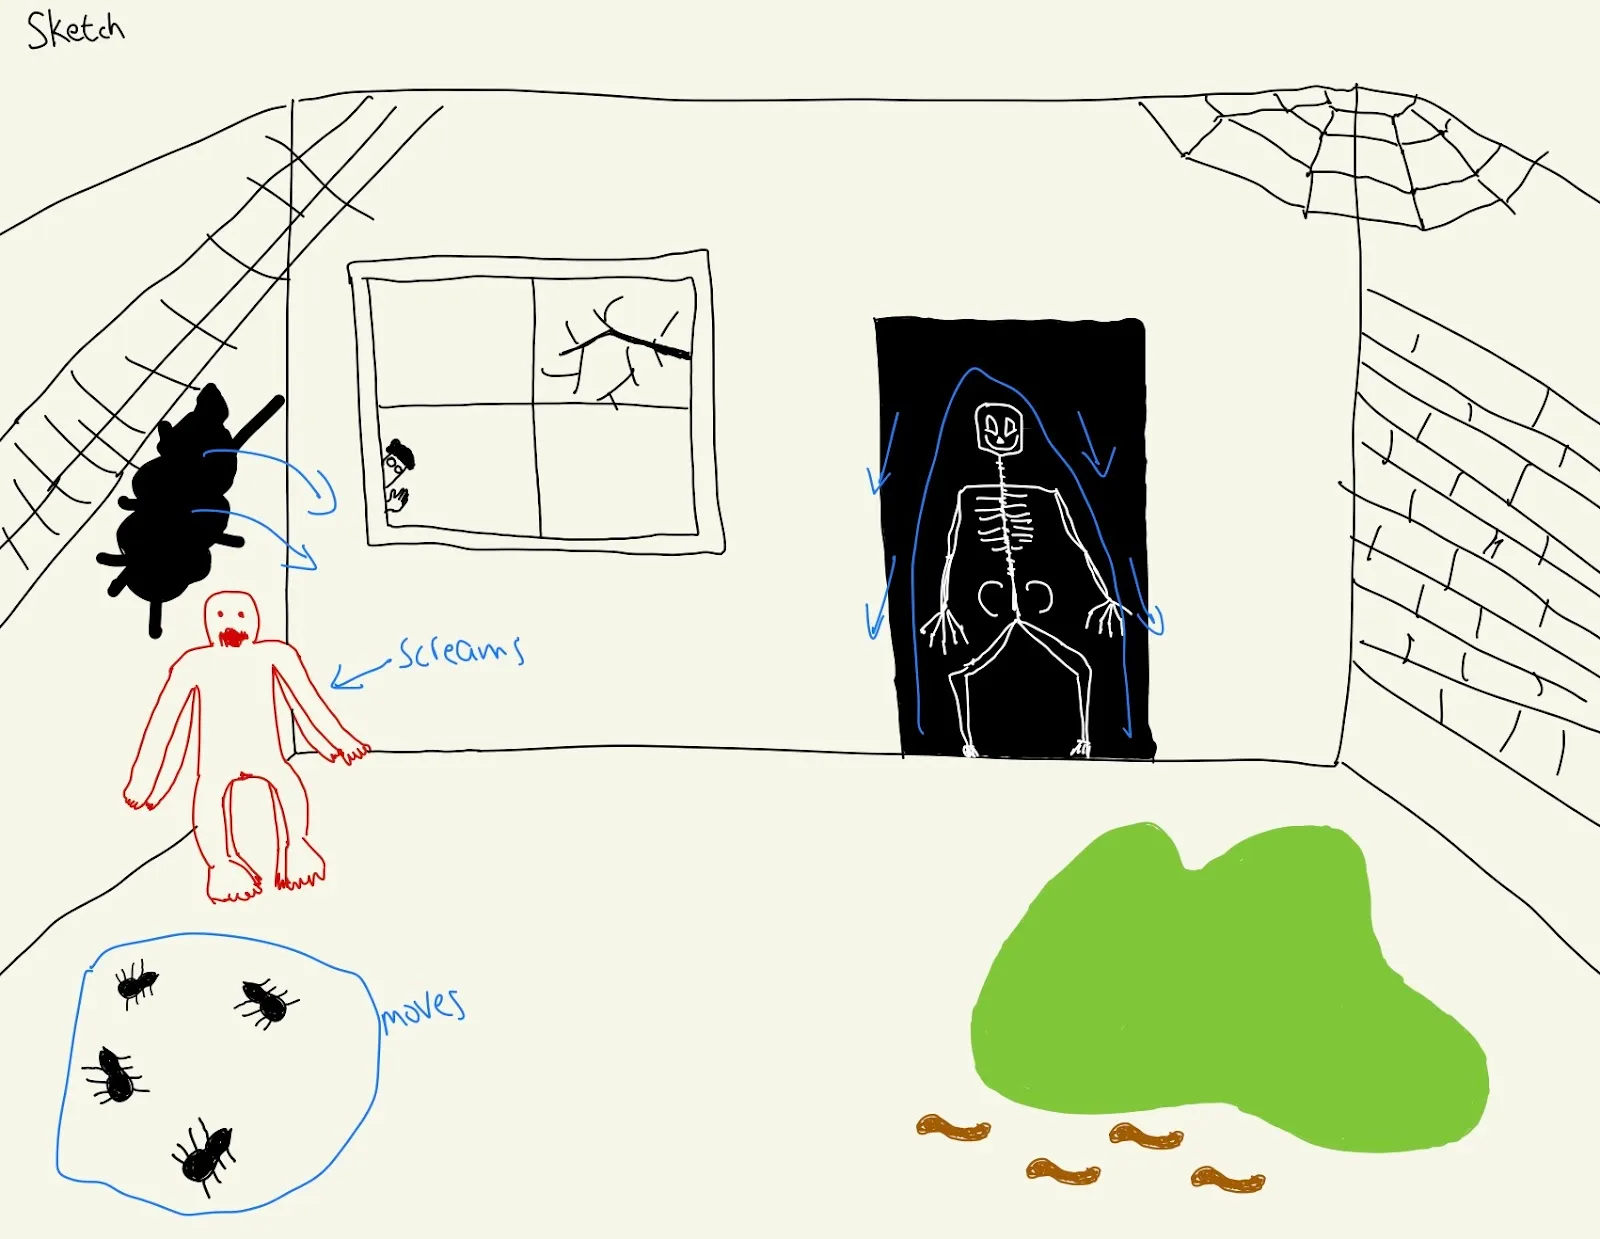
In our third sketch, we envisioned putting users directly into a haunted room, similar to a room escape game. The user is instantly greeted by creepy creatures as well as silhouettes of creatures, and they have to find clues to help them escape the room.
The blue arrows indicate mechanisms to be performed to users when they get close: when they get close to the huge bug on the left wall and the tall skeleton, they would jump at them; the little red creature screams when the user approaches; and the pile of bugs crawls around on the floor. The user will have to approach them to gather the keys to finally exit the haunted room.
The blue arrows indicate mechanisms to be performed to users when they get close: when they get close to the huge bug on the left wall and the tall skeleton, they would jump at them; the little red creature screams when the user approaches; and the pile of bugs crawls around on the floor. The user will have to approach them to gather the keys to finally exit the haunted room.
Implementation
At the outset of our implementation, we explored both Unity and A-Frame as potential platforms. However, we quickly encountered issues with Unity, as building for iPhone from a Windows environment required additional external tools, which hindered efficient development. Although Unity’s Google Cardboard XR Plugin offered exciting possibilities that we were eager to explore, we ultimately decided to move forward with A-Frame due to its more straightforward development process.
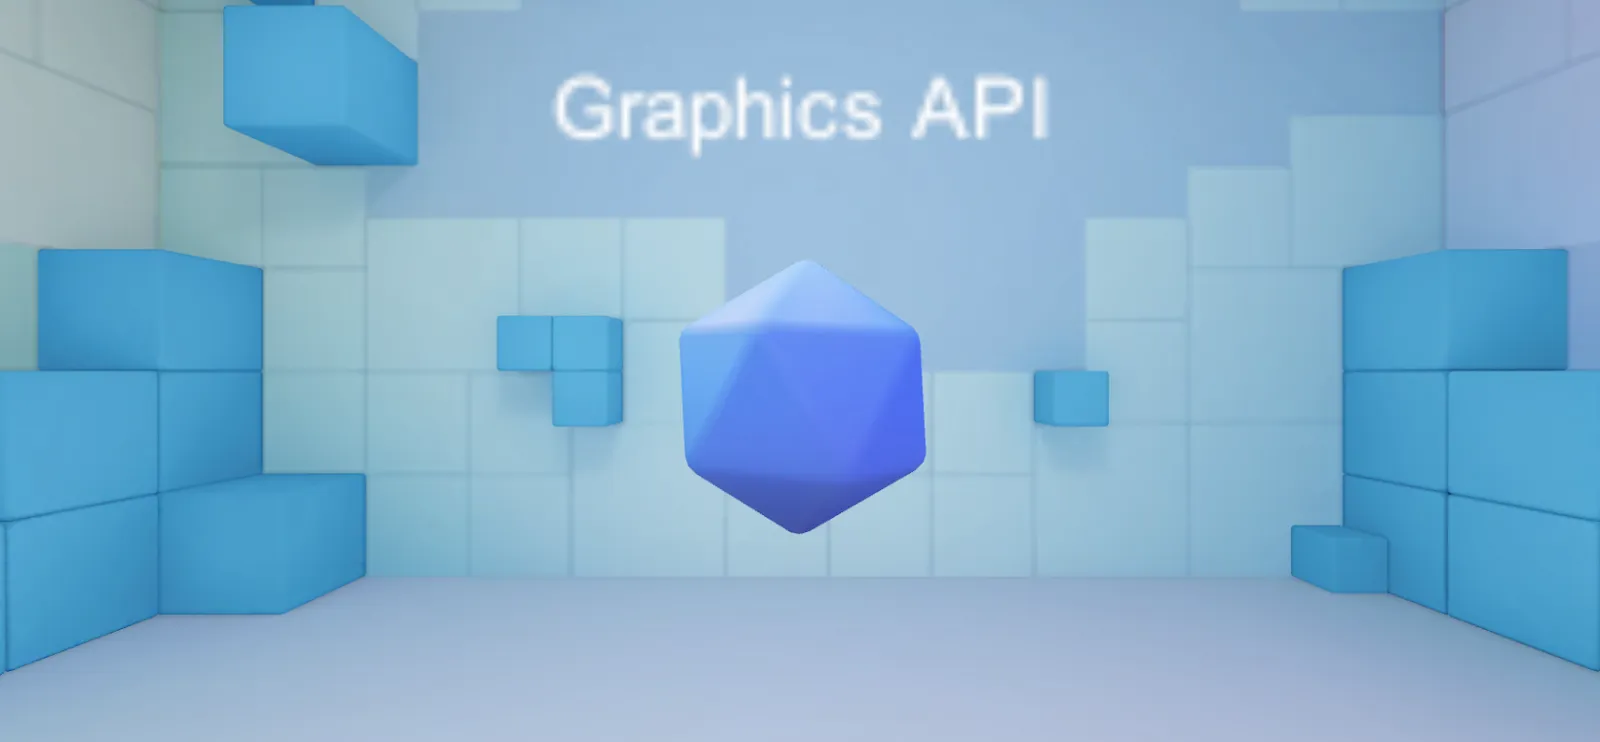
Unity sample scene for Google Cardboard
We initially used Glitch to develop our A-Frame scene, which helped us gain a foundational understanding of A-Frame, as none of us had prior experience with VR development or the framework. However, we soon encountered challenges importing assets like sound samples and 3D models from external sources. To overcome these issues, we migrated our code to GitHub and switched to a local server for development. Incorporating custom 3D models, beyond A-Frame’s standard set, was essential for executing our vision, as we aimed to create a horror-themed experience.

Basic scene we created in Glitch
To make working with A-Frame easier we used both the A-Frame Watcher companion server plugin and the A-Frame Inspector plugin. The watcher companion server looked for changes in the inspector and would apply them in the VS Code HTML, and the inspector made it easier to move models around, rotate them, and resize them.
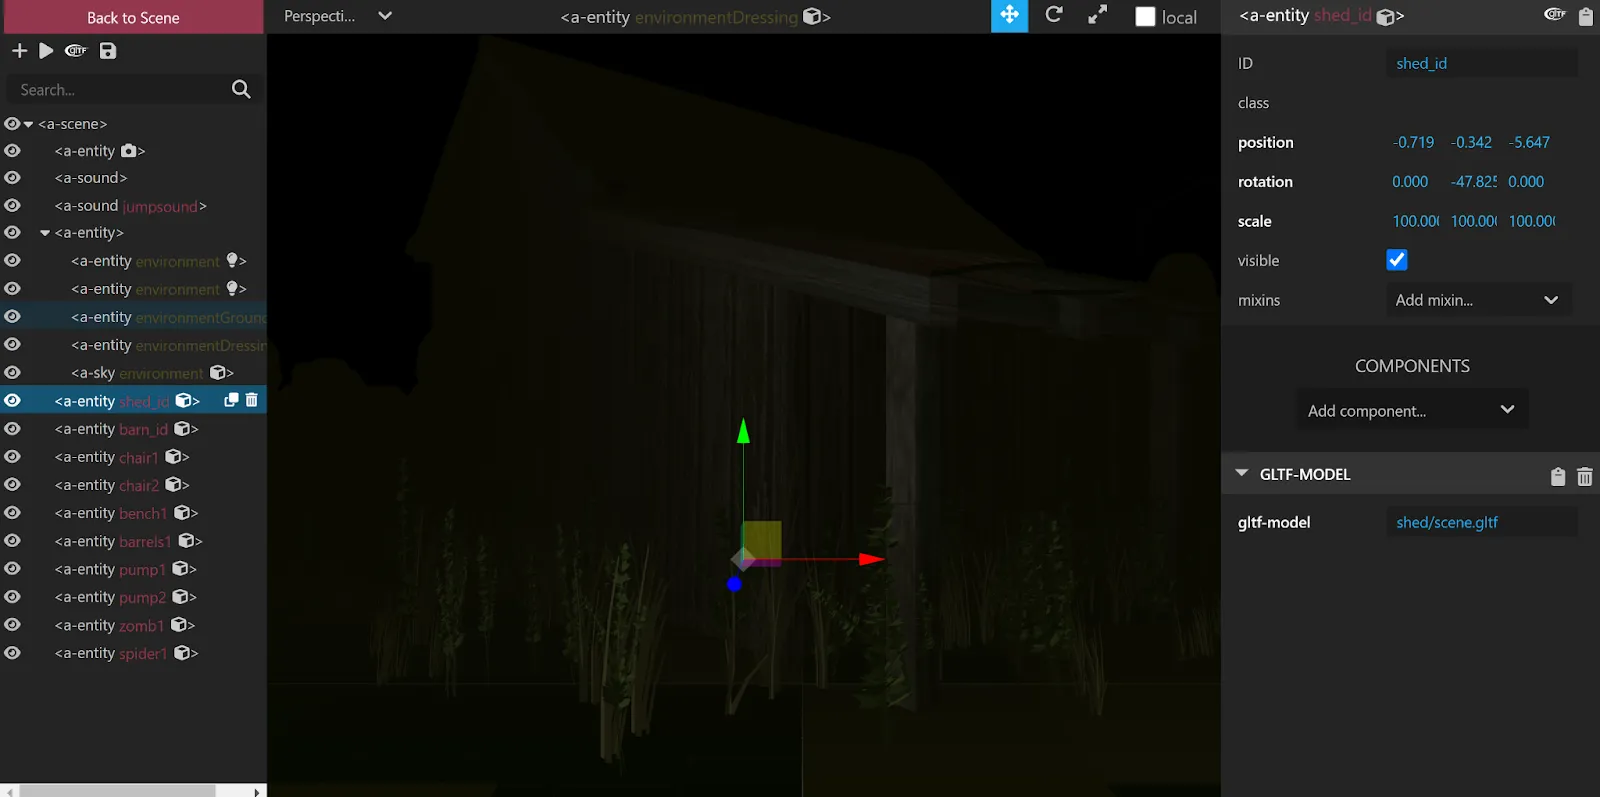
A-Frame Inspector
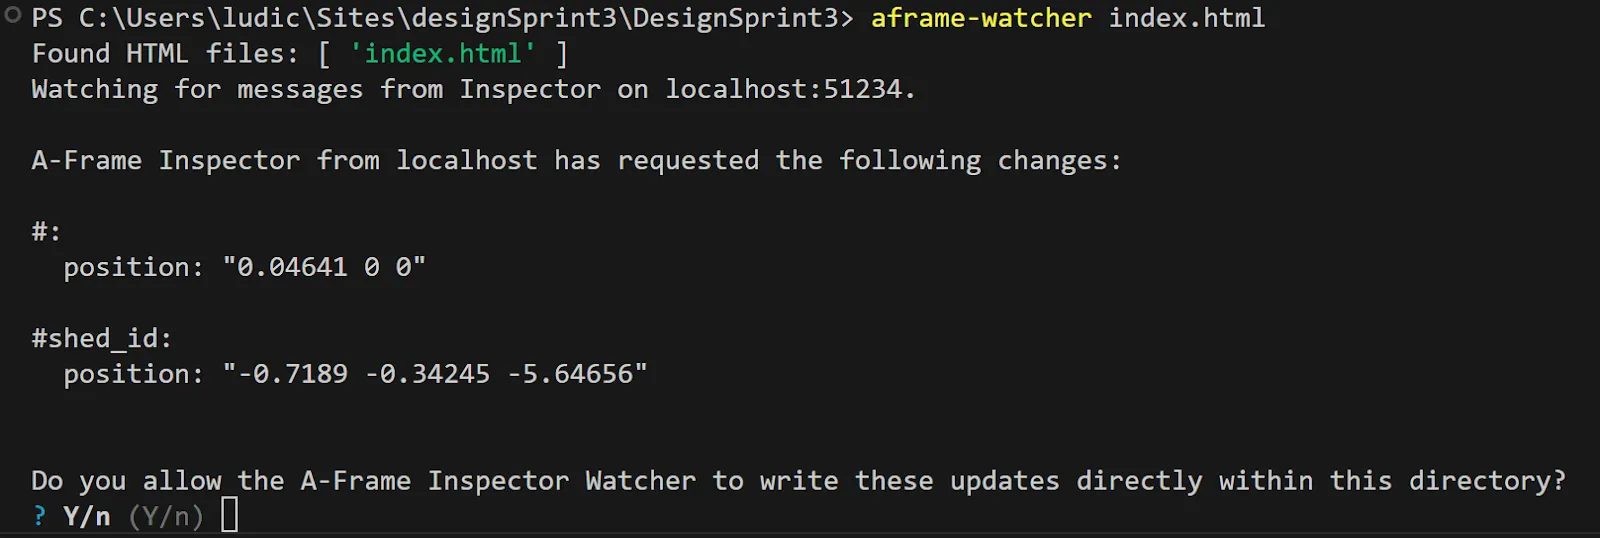
A-Frame Watcher terminal prompt after saving
After setting up our repository and development environment, we began sourcing models for our scene. Taking ideas from our moodboards, we searched for models that go with the haunted house theme. Because we were only sourcing free models, we couldn’t find all the models that we drafted ahead of time, but we went with the best ones that we could find.
Most of the models were obtained from platforms like poly.cam, CGTrader, and Sketchfab, with links to each model included in the HTML code. We also sourced sound effects online to enhance the spooky atmosphere and support the jumpscare we had planned, utilizing A-Frame’s sound component to integrate the audio.
Initially, we aimed for an indoor setting resembling a haunted house. However, we faced difficulties with positioning and found the environment too restrictive. As a result, we transitioned to a more open setting. After experimenting with a variety of backgrounds, we leveraged the A-Frame preset library (available here: https://github.com/supermedium/aframe-environment-component), which generated a forest environment that became the foundation of our VR experience. We then customized the colors and fog to create a more eerie atmosphere.
All models were imported as assets and added to the scene as entities, each assigned a unique ID to allow proper manipulation through the inspector. This allowed us to easily manage and modify key elements in the experience.
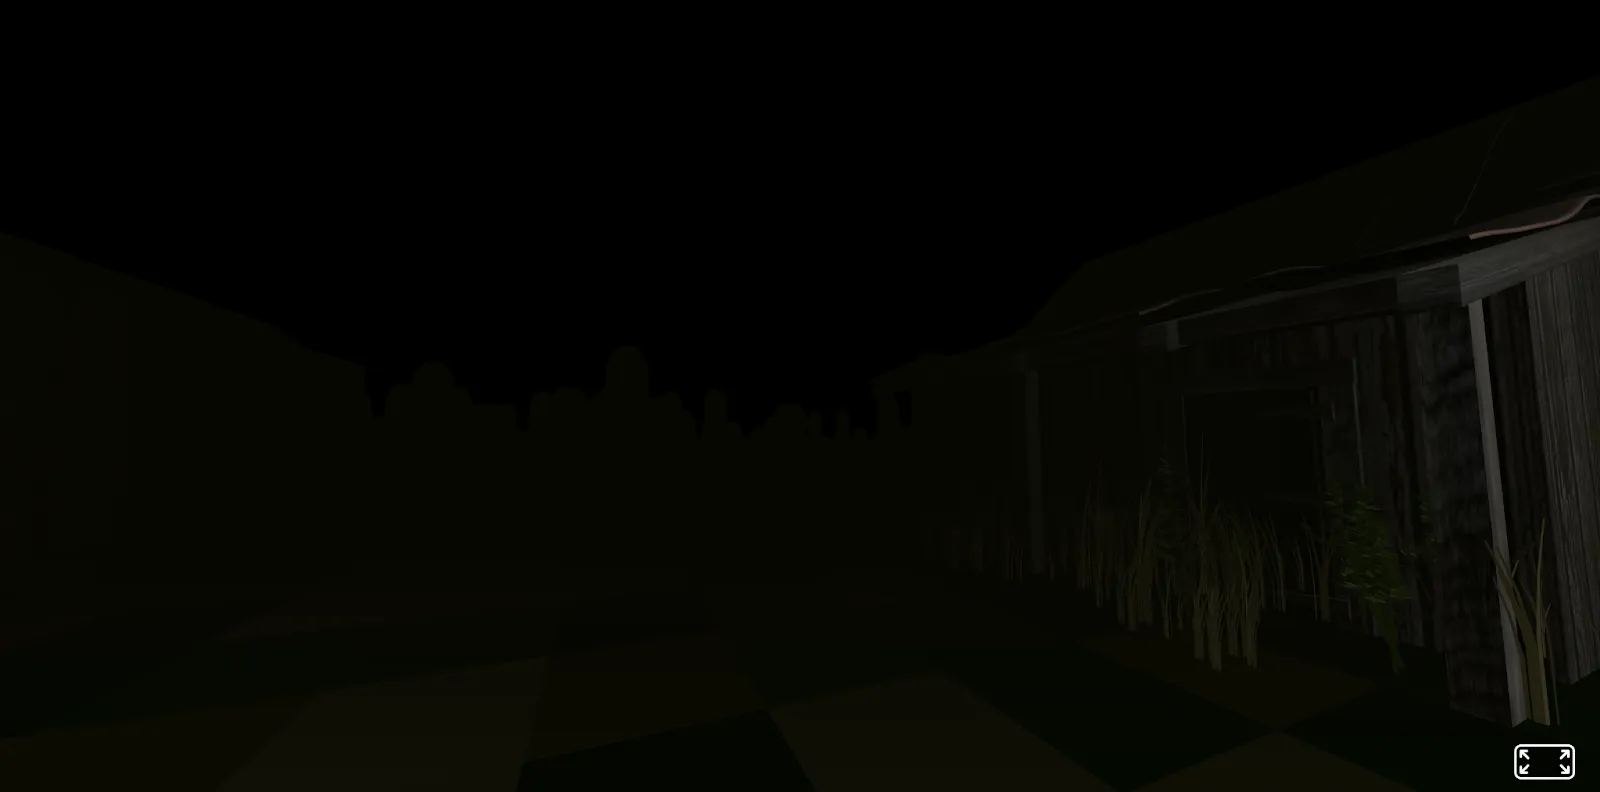
Older version of the scene that was much darker
At this stage, we had a chilling scene with ambient sound effects, but we also wanted to implement movement so users could walk between the two buildings. A-Frame natively supports WASD controls for camera movement, which we utilized in our demo video. However, due to the limited input options with Google Cardboard, we opted to create an automatic movement system using JavaScript. This system adjusts the camera’s position incrementally in the direction the user is looking, based on the camera’s rotation, with each tick. This position tracking also helped determine if the viewer was in the right spot to trigger the jumpscare.
The jumpscare was also implemented in JavaScript, where we moved the position of an entity and played the corresponding sound effect. While we would have liked to develop the jumpscares and animations further to make them more refined and realistic, this was the best we could achieve given the time constraints.
From there, we encountered additional issues with the remotely hosted version of the website and the mobile version. Unfortunately, many of these problems couldn’t be fully resolved and required workarounds. Initially, we uploaded 3D models to GitHub, but the files were too large for Git to accept. To address this, we installed Git LFS, allowing us to push the models into source control and run the VR experience locally. However, GitHub Pages did not support Git LFS, which we hadn’t realized at first. This caused the models to display correctly in the local version but completely disappear in the remote version. To resolve this, we had to stop using Git LFS and reduce the model file sizes to under 100 MB. Unfortunately, this forced us to abandon several models to stay within the file size limit.
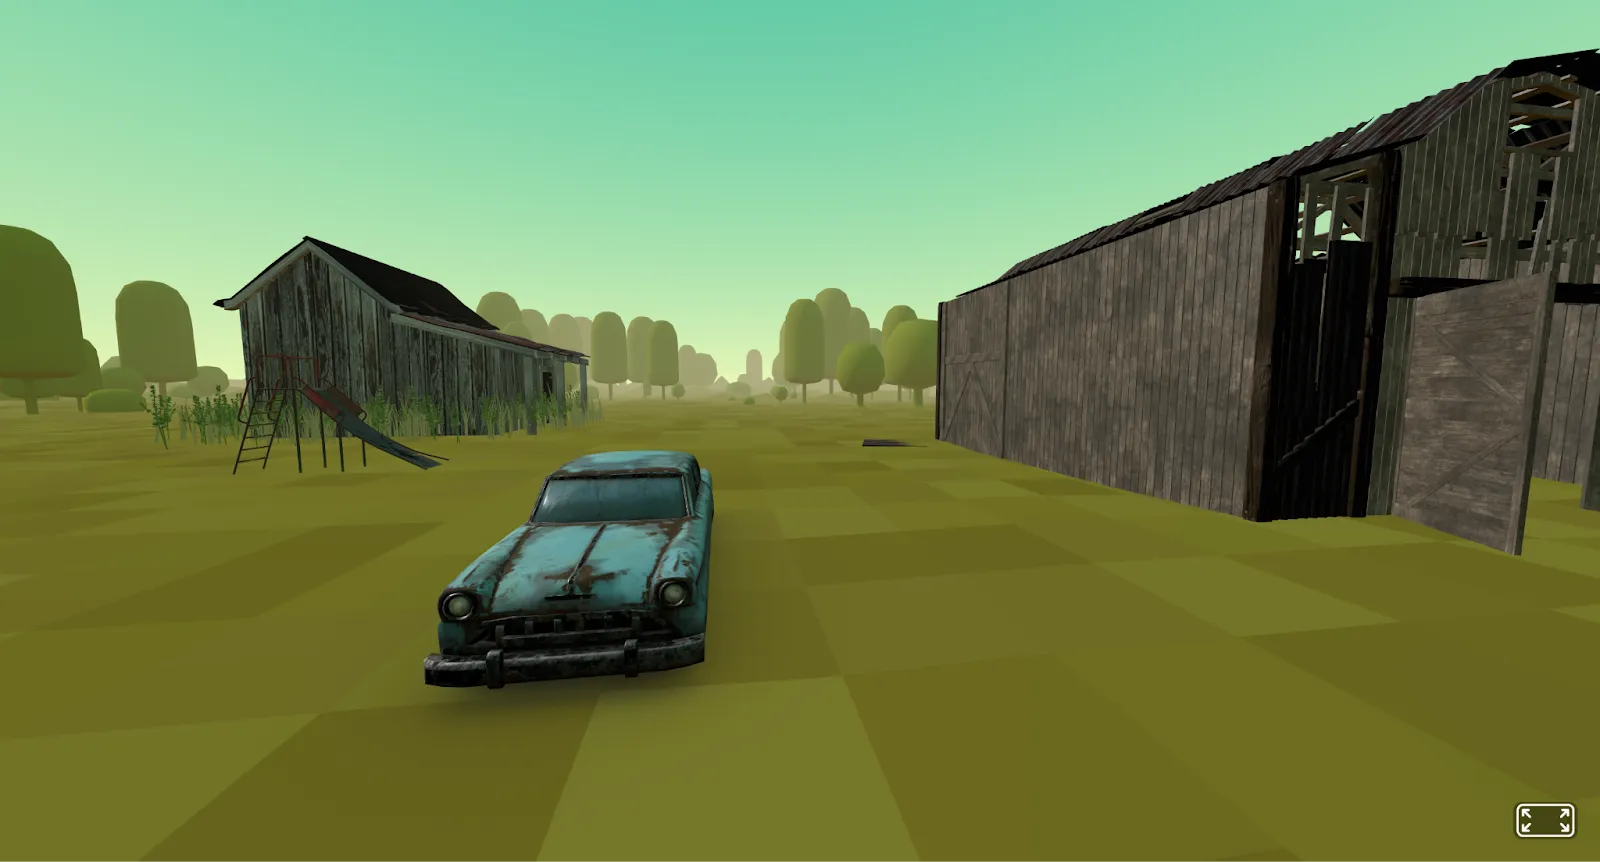
VR version with Git LFS and more models
The mobile version presented a similar issue. While the models did display, they were too resource-heavy for the site to run smoothly, causing significant lag before eventually crashing. This issue persists on mobile devices, where rapid camera movement can cause the models to overload and crash the webpage, even when the camera is stationary. This problem may vary across different devices, we would have to conduct more testing to see if that is the case.
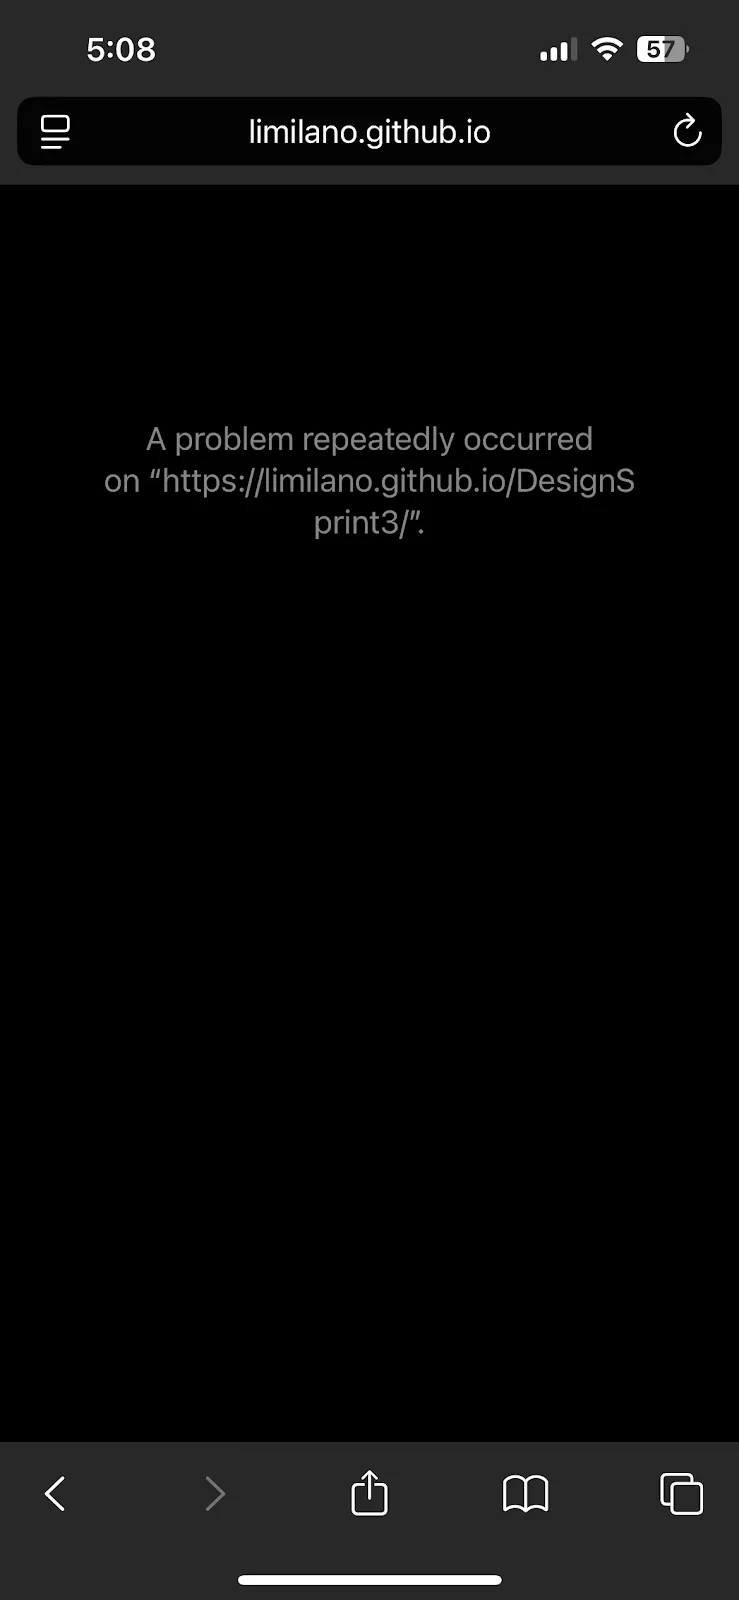
Error message on our final site
Another minor challenge we faced when refining the scene was the variation in brightness across different monitors. Striking a balance between too dark and too bright proved difficult, as the maximum brightness levels can vary significantly between displays. This issue was also highlighted during our demo, where even on a single monitor, not everyone was satisfied with the brightness settings. Many horror games offer the option to adjust brightness within the settings, which is something we could have explored further if we had more time.
Final product
Demo video: Click Me!
Live Site: Click Me!
Final product
Demo video: Click Me!
Live Site: Click Me!
Feedback
In class on October 30, 2024, all design groups shared their VR experience with all other groups in the class. People found the virtual world to be immersive, interactive, and interesting, and some even found it quite scary.
Overall, people really enjoyed the big spider jumpscare and the overall air of spookiness that we built. On top of the positive feedback, we also received the following suggestions that we could implement in the future:
Overall, people really enjoyed the big spider jumpscare and the overall air of spookiness that we built. On top of the positive feedback, we also received the following suggestions that we could implement in the future:
- 1. “Low visibility of the house(s), and possibilities of warning signs.” The house was indeed difficult to see in such a low light environment, and on some computers, the houses were almost impossible to see. During our process of implementation, one of our versions was a world with a lot of natural light, which meant everything had plenty of visibility, but the spookiness of the environment was heavily discounted. We decided to go with the much lower brightness to suit the theme better. Warning signs would be great to tell users where to go to find the dark houses, so that would be a way to get the best of both worlds.
- 2. “More Interactive components.” Mostly due to time and expertise constraints, we did not implement more interactivity beyond moving around. But abilities to climb ladders, pick things up, and interact with creatures would all be cool features to implement.
- 3. “Moving control was difficult to navigate.” Limited to the scope of VR (Google Cardboard more specifically), we had to let the user move some way and this was the easiest method we could think of. Anything above this would require better VR technology. Later on, since the mobile version always crashes, we updated to a version where the user controls movement via arrow keys and dragging their mouse for direction. It becomes a lot easier to control not constantly moving.
- 4. “Sprinting and footsteps sound effects.” Sprinting would also include a lot more advanced implementations on A-Frame that we cannot get to in the time constraints. However, footstep sound effects should be intuitive to implement and enhance the immersiveness of the experience, for users to better insert themselves into the environment.
Reflection
Through solving the technical problems, we have gained a better understanding of A-Frame as well as working with VR in general. When developing a VR experience, we had the chance to explore different aspects that are crucial for immersiveness, and were able to actually implement several components, including audio and interactive components. Feedback from our peers helped us to see our product from different perspectives, and were insightful for future developments. We also benefited from the clear division of work in our group, with swift communications that facilitated our development process.